The spring elastic drum, often found in toys, musical instruments, or even some specialized machinery, relies on the unique properties of a spring-tensioned membrane to produce sound or movement. Manufacturing these drums involves a precise sequence of steps to ensure proper tension, durability, and acoustic quality. Let’s delve into the fascinating process of bringing these rhythmic components to life.
Step 1: Material Sourcing and Preparation 📦
The foundation of a quality spring elastic drum lies in its components.
Drum Body Material: Source suitable materials for the drum’s frame or body. This could be plastic (e.g., ABS, polypropylene), wood, or even metal, depending on the application and desired acoustics. Membrane Material: Select the elastic membrane material. Common choices include latex, silicone, or specialized synthetic rubbers known for their elasticity and durability. The thickness and elasticity will directly impact the drum’s sound. Spring Material: Acquire high-quality spring wire, typically steel (e.g., music wire, stainless steel) or a specialized alloy, chosen for its tensile strength and fatigue resistance. The wire diameter and material properties will determine the spring’s tension. Other Components: Gather any additional parts like mounting brackets, tensioning rings, or decorative elements. Material Preparation: Cut, mold, or machine the drum body components to their precise dimensions. Prepare the membrane by cutting it into the required shape (usually circular) and punching any necessary holes for attachment. Step 2: Spring Coiling and Forming 🌀
The spring is the heart of the “elastic” drum, providing the tension.
Wire Feeding: The spring wire is fed into a spring coiling machine, which precisely controls the wire’s movement and tension. Coiling: The machine coils the wire around a mandrel, forming the desired spring shape (e.g., compression spring, extension spring). Parameters like coil diameter, pitch, and number of coils are critical for achieving the correct tension. Heat Treatment (Optional but Recommended): For certain spring materials, heat treatment (stress relieving) may be performed after coiling to improve the spring’s elasticity, fatigue life, and dimensional stability. End Finishing: The ends of the spring may be ground flat or formed into hooks or loops, depending on how they will attach to the drum membrane and body. Step 3: Drum Body Assembly 🏗️
Constructing the drum’s framework.
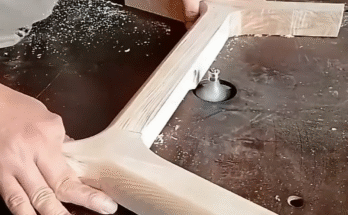
Frame Assembly: Assemble the main body or frame of the drum. This might involve snapping plastic parts together, gluing wooden components, or welding metal pieces. Mounting Points: Ensure that the drum body has secure mounting points or channels designed to hold the spring and the membrane. Step 4: Membrane Attachment and Initial Tensioning 🥁
Connecting the elastic membrane to the drum body and spring.
Membrane Placement: Carefully position the elastic membrane over the opening of the drum body. Initial Securing: Secure the edges of the membrane to the drum body. This could involve using an adhesive, a clamping ring, a series of small fasteners, or a groove-and-lip design. Spring Attachment: Attach one end of the coiled spring to a designated point on the drum body. Connecting Spring to Membrane: Connect the other end of the spring to the center (or specific points) of the elastic membrane. This is where the initial tension is applied. The spring will pull on the membrane, creating the “drumhead” effect. Step 5: Fine-Tuning and Calibration 🎛️
Achieving the desired acoustic or mechanical properties.
Tension Adjustment: This is a critical step. The tension of the spring directly influences the drum’s sound (pitch and resonance) or its mechanical response. Adjustments can be made by: Spring Length/Pre-compression: Modifying how much the spring is compressed or extended during assembly. Attachment Points: Fine-tuning the position of the spring’s attachment points on the membrane or body. Additional Tensioning Mechanisms: Some designs might incorporate screws or levers to further adjust membrane tension. Sound/Functionality Testing: For musical drums, the drum is tested for its acoustic properties (pitch, sustain, tone). For mechanical applications, its response to impact or vibration is tested. Balance and Symmetry: Ensure the tension is evenly distributed across the membrane to prevent warping or uneven sound. Step 6: Finishing Touches and Quality Control ✅
The final steps before packaging.
Trimming Excess: Trim any excess membrane material around the edges for a clean finish. Cleaning: Clean the drum to remove any manufacturing residue, dust, or fingerprints. Decoration/Branding (Optional): Apply any decorative elements, paint, or branding logos. Final Inspection: Conduct a thorough quality control check. Inspect for: Proper tension and sound/response. Secure attachment of all components. Absence of material defects (tears, cracks, deformities). Overall aesthetic quality. Packaging: Package the finished spring elastic drums for shipping or distribution. The Innovation Behind the Bounce 💡
The manufacturing of spring elastic drums is a testament to precision engineering, where the careful selection and assembly of materials, particularly the spring and membrane, determine the final product’s performance. From a simple toy drum to a complex vibration dampener, the principles of controlled tension and material elasticity are paramount.


