The process can be broadly divided into three main phases: preparation/rust removal, polishing/buffing, and protection.
1. Surface Preparation and Rust Removal
The goal of this initial phase is to completely remove all traces of rust, dirt, grease, and other contaminants to ensure that the subsequent polishing steps are effective and do not simply grind debris into the metal.
A. Initial Cleaning
-
Washing: The metal object should first be washed thoroughly with warm water and a mild detergent or degreaser to remove surface dirt, oil, and loose debris. This is crucial as contaminants can impede the action of rust removers or cause scratching during mechanical abrasion.
-
Drying: Ensure the surface is completely dry before proceeding, as residual moisture can interfere with chemical treatments and lead to immediate flash rusting.
B. Rust Removal (Descaling)
The method chosen depends on the severity and extent of the rust:
-
Mechanical Methods: For light to moderate rust, physical abrasion is the most common method.
-
Manual Abrasion: Use a wire scratch brush, coarse abrasive pads, or sandpaper (starting around 220-grit) to scrub away the surface rust.
-
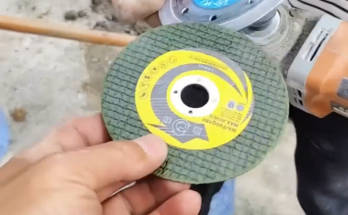
Power Tools: For larger areas or heavy rust, power tools like electric sanders, angle grinders with flap discs, or rotary tools (like a Dremel) fitted with wire brush attachments are used. Safety gear (gloves and goggles) is mandatory to protect against flying debris.
-
Note: The goal is to reach clean metal without causing excessive damage or deep scratches.
-
-
Chemical Methods: For intricate or delicate parts, or heavy rust where mechanical methods are too aggressive, chemical rust removers are effective.
-
Commercial Removers: These typically contain acids (like phosphoric acid) that dissolve the rust (iron oxide) and often convert it into a more stable compound (like iron phosphate, a blackish coating). Always follow the manufacturer’s instructions, use appropriate personal protective equipment (PPE), and ensure the product is compatible with the metal type.
-
DIY Solutions: For minor rust, household items like vinegar (acetic acid) or a paste of baking soda and water can be used as milder alternatives. Small items can be soaked in vinegar overnight, and the rust scrubbed off afterward.
-
2. Gradual Polishing and Buffing
Once the rust is completely removed, the surface will likely be rough and dull. This phase uses progressively finer abrasives and polishing compounds to smooth the metal and bring out the shine.
A. Smoothing and Refining the Surface (Sanding)
This step is the most critical for achieving a high-quality finish. It involves a systematic progression of sanding grits to eliminate scratches left by the rust removal phase.
-
Gradual Fining: Start with a grit that is coarse enough to remove the deepest scratches remaining from rust removal (e.g., 220-grit or 320-grit), and then move sequentially to finer grits (e.g., 400, 600, 800, and up to 1000-grit or higher for a mirror finish).
-
Technique: Sand in a consistent, unidirectional pattern at each grit level. Only switch to the next finer grit when the scratch pattern from the previous, coarser grit has been completely erased. Wet sanding is often preferred to keep the surface cool and prevent abrasive clogging.
B. Buffing with Compounds
After sanding to the desired satin finish, polishing compounds are introduced using a buffing wheel (on a bench polisher, drill, or rotary tool).
-
Compound Selection: Choose the appropriate polishing compound (often called “rouge”) based on the metal type and the desired finish.
-
Tripoli (Brown): Coarse cut, often used for initial buffing on soft metals like brass or aluminum.
-
White Rouge: Medium cut, excellent for stainless steel and harder metals.
-
Green Rouge (Chromium Oxide): Very fine cut, ideal for a final mirror polish on stainless steel, chrome, and other hard metals.
-
-
Application: Apply the compound to the buffing wheel, not directly to the metal.
-
Execution: Buff the metal surface in smooth, overlapping strokes, applying moderate but consistent pressure. Keep the wheel moving constantly to avoid heat build-up, which can burn or discolor the metal. Reapply compound as needed to maintain a consistent cut. Different wheels should ideally be used for different compounds to prevent cross-contamination.
3. Final Cleaning and Protection
The last step ensures the polished surface is clean and protected from future rust and corrosion.
A. Final Wipe and Cleaning
-
Residue Removal: Wipe down the polished metal surface with a clean microfiber cloth to remove all leftover polishing compound and residue. A wash with warm soapy water may be necessary, followed by immediate and thorough drying.
-
Inspection: Inspect the finish under good lighting for any swirl marks, dull spots, or remaining imperfections. If found, a slight touch-up buffing may be required.
B. Corrosion Protection
To prevent the rapid return of rust (especially on carbon steel), a protective barrier is essential. Polishing itself aids in protection by creating a smooth surface that resists the collection of moisture and contaminants (a process known as passivation on stainless steel), but a coating adds an extra layer of defense.
-
Protective Coatings: Apply a metal-specific protective coating such as:
-
Wax or Oil: A simple, non-permanent layer, commonly used on tools or machinery.
-
Rust-Inhibiting Paint or Primer: Essential if the part is to be painted, providing a strong, chemical barrier.
-
Clear Coat/Lacquer: A durable, permanent coating often used on decorative pieces to lock in the shine.
-
💡 Benefits of Polishing
Beyond mere aesthetics, the rust polishing process offers significant functional advantages:
-
Corrosion Resistance: Removing the microscopic surface roughness and oxidation eliminates crevices where moisture and contaminants can collect, thus dramatically reducing the likelihood of future rust and surface degradation.
-
Easier Maintenance: A smooth, polished finish is far easier to clean and sterilize, making it essential in sanitary, medical, and food-handling environments.
-
Improved Aesthetics: A polished finish signals quality and professionalism, which is critical in automotive, architecture, and consumer goods industries.
-
Reduced Friction and Wear: In mechanical applications, a smoother, polished surface can reduce friction and heat, extending the life of moving parts.
The entire rust polishing process is a blend of elbow grease, methodical progression, and chemical understanding. By following these steps—from initial cleaning and targeted rust removal to fine-grit smoothing and final protection—a corroded metal object can be restored to a pristine and protected state, significantly increasing its value and longevity.