A house’s roof is its primary defense against the elements—sun, wind, and, most critically, water. Water penetration, even in small amounts, can lead to serious and costly issues, including structural damage, wood rot, electrical hazards, and the proliferation of mold and mildew within the walls and ceiling. Waterproofing is not merely a repair; it is an essential maintenance task that dramatically extends the lifespan of the roof structure and preserves the integrity of the entire home.
The process of effectively waterproofing a residential roof requires careful planning, meticulous preparation, the selection of appropriate materials, and precise application. This comprehensive guide breaks down the steps involved in ensuring your roof remains a stalwart, watertight barrier.
1. 🔍 Initial Inspection and Assessment
Before any material is applied, a thorough inspection is paramount. You need to understand the current condition of the roof and identify existing damage that must be addressed first.
-
Identify the Source of Leaks: Pinpoint the exact locations where water is entering. Look for water stains on the ceilings or walls inside the house. On the roof, common culprits include flashing around chimneys, vents, skylights, and low points where water tends to pool.
-
Evaluate Existing Damage: Check for cracked tiles, loose shingles, blistered or torn membranes, and degraded mortar or sealant. Any existing saturated insulation or rotten decking must be removed and replaced.
-
Assess Drainage: Ensure gutters and downspouts are clear and functioning correctly. Water pooling on a flat roof or slow runoff on a pitched roof indicates a potential drainage issue that needs correction before waterproofing begins.
-
Determine the Roof Type and Material: The type of roof (pitched, flat/low-slope) and its existing material (concrete, metal, asphalt shingles, tiles) will dictate the most suitable waterproofing system.
2. 🧹 Surface Preparation: The Foundation of Success
Preparation is arguably the most critical stage. A clean, smooth, and dry substrate is essential for the proper adhesion and performance of any waterproofing product.
-
Cleaning: Remove all dirt, debris, moss, algae, loose granules, and old, peeling waterproofing material. For flat concrete roofs, this may involve a thorough sweeping followed by power washing. Allow the surface to dry completely afterward, which may take several days depending on the weather and humidity.
-
Repairing Cracks and Voids: Fill all structural cracks, holes, and voids using a specialized, non-shrink repair mortar or a polyurethane sealant compatible with the waterproofing system you intend to use. Cracks larger than $3 \text{mm}$ may require the placement of a reinforcing mesh or fabric over the repair.
-
Detailing Critical Areas: Special attention must be paid to detailing the vulnerable areas. This includes all corners, pipe penetrations, edges, and flashing. Apply a thickened layer of the base coat or a dedicated sealant/mastic and embed a reinforcing mesh or fabric strip over these areas before the main coating process.
3. 🛡️ Material Selection: Choosing the Right Waterproofing System
The ideal waterproofing system depends heavily on the roof type, climate, budget, and desired longevity. Here are the most common and effective solutions for residential use:
A. Liquid Applied Membranes (LAMs)
These systems are highly versatile and increasingly popular. They are applied as a liquid and cure to form a seamless, elastomeric (flexible) rubber-like membrane.
-
Acrylic Coatings: Water-based, environmentally friendly, and highly reflective, making them excellent for energy savings. They are a good choice for flat or low-slope concrete and metal roofs in moderate climates. They are susceptible to ponding water damage over long periods.
-
Polyurethane Coatings: Highly durable, excellent resistance to UV, abrasion, and ponding water. They are more expensive but offer superior long-term protection, making them ideal for high-traffic or high-exposure flat roofs.
-
Bituminous/Elastomeric Coatings: A cost-effective solution often used on asphalt or modified bitumen roofs. They provide good waterproofing but may not be as UV-stable or elastomeric as acrylic or polyurethane.
B. Sheet Membranes
These come in rolls and are typically installed on flat roofs or roofs with specific structural requirements.
-
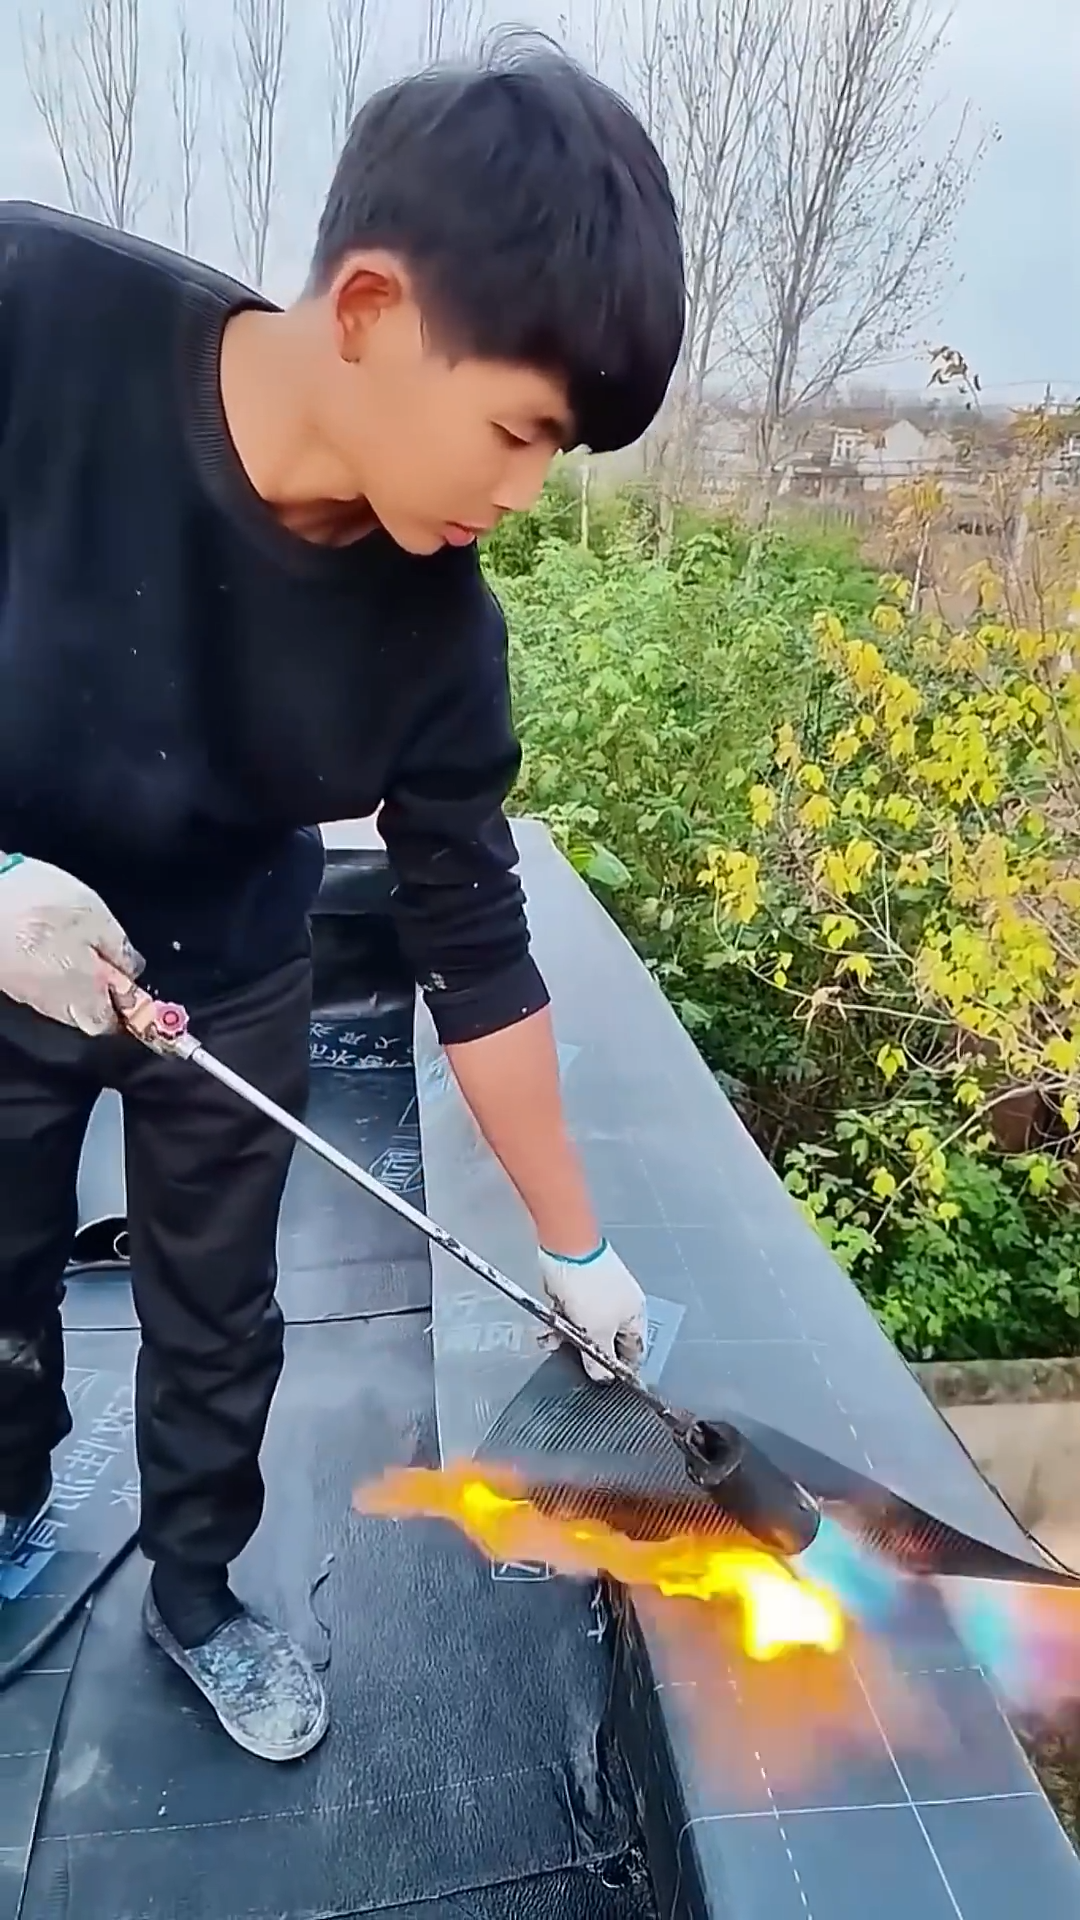
Modified Bitumen (Mod-Bit): A derivative of asphalt reinforced with polymer modifiers (like SBS or APP) for improved elasticity and durability. It is often applied using a torch (requiring professional expertise) or self-adhering sheets.
-
Single-Ply Membranes (TPO, PVC, EPDM): Large, flexible sheets that are mechanically fastened, ballasted, or fully adhered to the roof deck. They offer excellent durability, weather resistance, and in the case of TPO/PVC, often come in light colors for energy efficiency.
4. 🎨 Application Process
Once the surface is prepared and the material is selected, the application must follow the manufacturer’s specifications precisely.
Step 4.1: Priming
-
Apply a suitable primer if recommended by the membrane manufacturer. Primer ensures maximum adhesion of the waterproofing system to the substrate (especially crucial for non-porous surfaces like metal or old membranes). Apply it evenly using rollers or spray equipment and allow it to dry to a tacky finish.
Step 4.2: Applying the Base Coat
-
For Liquid Applied Membranes, the system is typically applied in multiple layers. Start with the base coat, which is often a thicker, high-solids version of the chosen coating.
-
Apply the coating evenly with a long-nap roller, brush, or specialized airless spray equipment. Ensure the application rate meets the manufacturer’s specification for achieving the required dry film thickness (DFT). This measurement is crucial for warranty compliance and performance.
Step 4.3: Embedding Reinforcement (Optional but Recommended)
-
If the system calls for a reinforcing layer (often a polyester or fiberglass mesh/fabric), it is embedded while the base coat is still wet. Lay the fabric smoothly, ensuring there are no wrinkles or bubbles, and press it gently into the wet coating with a roller or brush. The base coat must completely soak through and encapsulate the fabric.
Step 4.4: Applying the Top Coat(s)
-
Once the base coat (and reinforcement, if used) has fully cured—check the manufacturer’s data sheet for the required drying time—apply one or more top coats.
-
The top coat provides UV resistance, additional waterproofing depth, and the desired surface finish (often a reflective white or light color). Ensure each layer is applied perpendicular to the previous layer for full, even coverage. The total cumulative thickness of all layers determines the final protection level.
5. ✅ Curing and Quality Control
Patience during the curing phase is essential.
-
Curing Time: Avoid foot traffic, heavy objects, or water contact for the entire curing period, which can range from 24 hours to several days, depending on the material, temperature, and humidity. Rushing this stage can compromise the integrity of the membrane.
-
Flood Testing (for Flat Roofs): For new or fully exposed flat roofs, a final flood test is often conducted after the membrane has cured. The roof area is blocked off and flooded with a few inches of water for 24-48 hours. If there are no signs of leaks inside the building, the waterproofing is successful.
-
Final Inspection: Once cured, conduct a final visual inspection. Look for missed spots, pinholes, or areas where the coating might have sagged or pooled. Repair any deficiencies with an additional spot application of the top coat.
Conclusion
Waterproofing the roof of a house is a substantial investment that pays dividends in long-term structural security and reduced maintenance costs. By following the systematic process of Inspection, Preparation, Material Selection, and Layered Application, homeowners can transition their roof from a vulnerability to a durable, impenetrable shield. While many small repairs can be tackled as DIY projects, the complexity and critical nature of a full-scale roof waterproofing job often warrant consulting or hiring licensed, experienced roofing professionals to ensure the work is executed to the highest standards and that product warranties remain valid. Ultimately, a successful waterproofing job is the key to a dry, healthy, and long-lasting home.